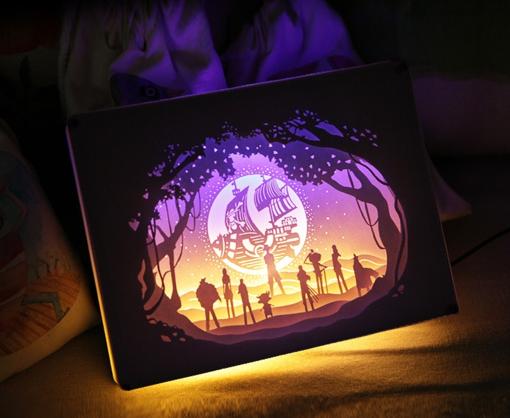
What is a Lunibox?
Lunibox is an art box that’s made by stacking layers of paper cuttings on top of each other. While the origin of Lunibox traces back to the 19th century inspired German ‘Scherenschnitte’, they were commercialized and mass-produced by a San Jose-based company Urelas around 2018 who ship around the world.
According to Urelas, there are 7 or 8 layers on an average in one Lunibox. These are intentionally cut in smaller proportions than the previous one in order to make the design more ‘poppy’. Some gap is maintained between these layers and an LED is put on the back to give the lighting polish.
We’ve listed the items and steps that go in the making of a Lunibox. However, if you want a pre-assembled Lunibox, you can order one directly from Urelas. They also make custom Luniboxes from provided images.
What you need
Wooden wine box 15-20 cms would be fine
From a DIY store
- Plastic light holder with fixing plate to fit standard light sorts, for example, E27 screw or BC22 pike
- Two fixing screws reasonable for wood – to coordinate with the size of your light holder and 1cm long
- Bulb to coordinate with light holder, like a minimal fluorescent or LED light
- 2m of 3-center link (ordinary electrical link with an earth wire – ask at the DIY store that it is reasonable for the light holder you have chosen)
Standard attachment
- 7 bits of 6mm x 6mm square segment a similar length as the longest side of your crate (along these lines, if your case is 30cm x 50cm, you ought to get sufficient wood for seven 50cm lengths)
- 16 13mm board pins
- Sheet of pressed wood for light gatekeeper estimating a large portion of the crate length x box width
- From workmanship shop
- Three sheets of significant burden watercolor paper adequately large to cover the open front of the case with 1cm additional line
- Sheet of chart paper (same size as watercolor paper)
- Concealing tape or Sellotape
Other stuff
- Scissor for cutting
- Sandpaper
- Mallet
- Specialty blade
- Cutting matt, OR ad libbed cutting surface like grain parcels/old sheet of wood
- Wood stick
- Metal ruler
- Drill – hand drill or force drill – with 8mm boring apparatus
- 2mm or 3mm boring tool (this ought to be a somewhat more modest breadth than the screws for the light holder)
- Pincers
- Pozidriv/Phillips screwdriver
- Little flathead screw driver – for wiring plug

Let’s get started
- Set up the crate by taking out any superfluous trimmings with forceps. Then, at that point clean, eliminate stickers with a moist material and sand down.
- On the more limited side of the case, measure the mid-point and from here attract a pencil line to the rear of the container. Discover the point one fourth of the way along this line from the rear of the crate, and drill an opening here with the 8mm bore. This is for the link to go through, so make sure that it fits prior to continuing!
- Spot the light holder base over the opening, with the goal that the opening is in the middle. With a pencil, mark where the screw positions will be. With the 2mm or 3mm boring tool, drill openings for the screws circumventing three-forth of the way through the wood.
- With the pozidriv screwdriver and the fixing screws, screw the light holder inside the case.
- Measure seven lengths of square-segment wood to fit inside the long side of the crate. Cut the lengths with a saw (or art blade assuming you don’t have one); sand the closures smooth. Slice one segment down the middle.
- Run an extra piece of square-area along one of within corners of the case. Track down the mid-point (top to bottom), and in the top portion of the profundity mark out three 6mm wide segments about 1cm separated, with one near the edge of the crate. Utilize this as a layout to stamp out, at one or the flip side of the two longer sides of the case, where the six long square-area lengths will go.
- Presently to wire up the electrical associations in the light holder. The live wire is brown, blue is impartial, and the green and yellow wire is the earth. The live and impartial wires go into the coordinating with contacts, while earth goes in the different connector (fig G). On the off chance that in any uncertainty, kindly check with somebody that you have it wired effectively. Utilizing a level headed screwdriver, unscrew the electrical contacts enough to drive the wires into place, then, at that point screw tight again and pull to check they are secure.
- When you are glad that the wiring is free from any and all harm, string the opposite finish of the link through the opening to the outside of the crate and screw in the light holder.
- Close to wire the fitting at the opposite finish of the link: Open up the attachment with a screwdriver and strip the link as in the past. Strip the individual links to 6mm of uncovered copper wire, and contort. Wire the attachment as displayed on the outline provided. Ensure you have wired it effectively and all associations are secure prior to shutting the attachment.
- Addition the bulb into the light holder; plug it in and switch it on. Ideally it will radiate light!
- To make the light gatekeeper, measure the short inward width of the case and the absolute tallness of the light. Add 3cm to the light tallness, and cut out a piece of wood to these estimations. Along one edge that is a similar length as the more limited internal width of the case, you can remove a cloud-like edge, or some other impact you like. Sand down the edges.
- Decide on a shape you would like to use to make a pattern – this version uses small crosses. They should be fairly small, about 2cm x 2cm, to avoid making the paper too floppy. On the graph paper, mark out the 1cm border along both width lengths; then draw out the shapes. Leave at least 1cm of paper at the edge of the design (plus the 1cm borders) and repeat the shape (altering the spacing for a slightly more random pattern) until it fills the whole paper.
- Place the cutting mat on a firm surface; then layer one piece of watercolour paper with the graph paper lined up neatly on top. Tape the graph paper in place (fig K).
- Using a sharp blade, cut through the graph and watercolour papers along the lines of the pattern.
- Remove the graph paper and push out the shapes; you might need to cut into some of the corners again to do this. Fold over the 1cm borders and slot these folded sections in between the two long runners closest to the lamp.
- Turn on the lamp to see the effect the first layer has created. There is another space at the front where you can add further paper layers. This version has cut cloud shapes into two more pieces of paper, and overlapped them at the front. You could also cut out more patterns too, just remember to keep the 1cm borders along the width edges intact for folding into the slot. For safety reasons, don’t add too many layers of paper; you need to make sure there is enough space for air to circulate for cooling. Also ensure that the paper doesn’t touch the lamp at any point.
- Boom, your Lunibox is now complete!


